

 Authenticate
 Manage Users
 Customize
 Auth0 AI
 Platform
Privileged Worker Token Exchange with Token Vault is currently in Early Access. To learn more about Auth0’s product release cycle, read Product Release Stages. To participate in this program, contact Auth0 Support or your Technical Account Manager.
Prerequisites
Only certain types of clients can use the Privileged Worker Token Exchange with Token Vault:- The client must be a first-party client, i.e. the
is_first_party propertyistrue. - The client must be a confidential client with a valid authentication mechanism, i.e. the
token_endpoint_auth_methodproperty must not be set tonone. - The client must be OIDC conformant, i.e. the
oidc_conformantmust betrue.
- Enable the Token Vault grant type for your client application.
- Configure Private Key JWT or mutual TLS authentication for your client application.
Configure client application
To configure the client application’s privileged access to Token Vault, you need to provide a public key that will be used to verify a signed JWT as the subject token. You also need to restrict which IP addresses the client may make requests from, and pin the client to the connections and scopes it’s allowed to request — without these, the Privileged Worker Token Exchange will not work.- Auth0 Dashboard
- Management API
- Navigate to Applications > Applications and select your application.
- Select the Settings tab, scroll to the Privileged Worker section, and toggle on Enable Privileged Worker. In the modal, select an existing public key credential or upload a new one, then select Save.
- Once the credential is saved, enter at least one IP address or CIDR range in the IP Allowlist field.
- Under Permissions, select Add Permission. In the modal, select a Connection and enter the Scopes this connection is allowed to request, then select Save. Repeat for each connection you want to allow. You can configure up to 5 permissions and 20 scopes in total.
- Select Save Changes.
- For each connection referenced in Permissions, make sure it’s also enabled for this application. Navigate to Authentication > [Connection type], select the connection, go to the Applications tab, and toggle the connection on for your application.
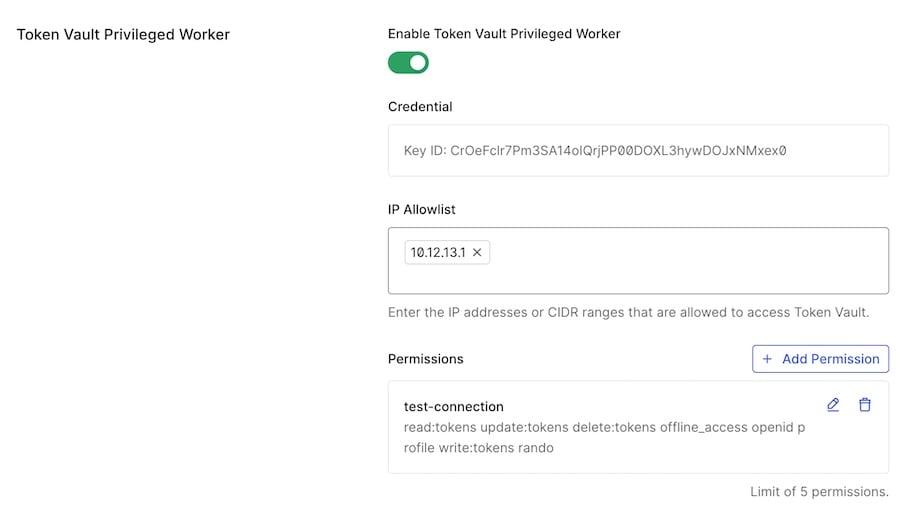
ip_allowlist (IP Allowlist in the Dashboard) restricts which IP addresses may make Privileged Worker exchange requests. This binds the client credential to known server egress IPs, so a leaked credential cannot be used from an arbitrary IP address. Both IPv4 and IPv6 addresses and CIDR ranges are supported, with a maximum of 10 entries.
The grants (Permissions in the Dashboard) pins the client to a specific set of connections and, within each connection, a specific set of scopes. A Privileged Worker token exchange request is rejected if it targets a connection not listed in grants. Additionally, requesting a narrower scope than what was granted causes Token Vault to return a token restricted to that narrower scope provided the identity provider supports downscoping, otherwise the request fails rather than silently returning the full granted scope. A maximum of 5 connections and 20 scopes (across all connections combined) can be configured. Note that the listed connection must be enabled for the client, as described above.
ip_allowlist and grants are not required to save a client’s configuration, but both must be populated for the Privileged Worker Token Exchange to work: any request from an IP not in ip_allowlist, or for a connection or scope not in grants, will be rejected.Create signed JWT subject token
After configuring your client application with the public key, you need to create the subject token that will be exchanged for an access token for an external API. The subject token is a JSON Web Token (JWT) with the necessary claims. It is signed with the private key. The JWT has a standard format and claims: Header
Payload
The following is an example JWT:
Do not include personally identifiable information (PII) in
audit_context. This value is recorded in tenant logs and may be visible to administrators and log streaming destinations.